
Your Legacy family file must first be converted to SQLite format for use by the GedFamilies app, then transferred to your Android device.
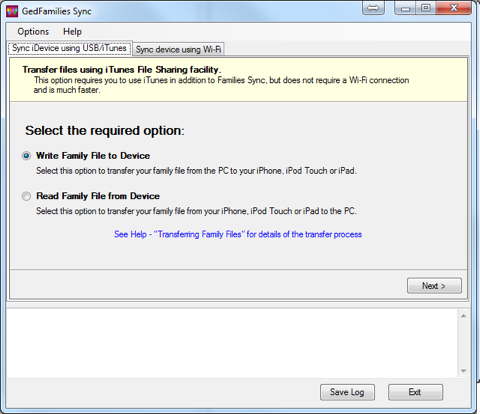
There are two ways to transfer files between the PC and your device using GedFamilies Sync: Wi-Fi and USB. Wi-Fi transfer requires that your device has a Wi-Fi connection to the same network as your PC. It is also recommended that iTunes is installed when using Wi-Fi transfer, as this enables GedFamilies Sync to automatically detect when your device is ready to sync. USB transfer involves connecting your device to the PC using a USB cable. Each method has its pros and cons. Wi-Fi transfer is simpler and more straightforward to use but is slower than USB. However, unless you have a very large family file or a large number of media files, we recommend using this method. USB transfer is much faster but a little more complicated to use. We recommend using USB if you have a particularly large file or if for some reason you’re not able to use Wi-Fi transfer.
As an alternative to Wi-Fi or USB you can use GedFamilies Sync just to convert the file to SQLite format, then transfer the file independently to the Android device using email or a cloud service. We will illustrate this method of transfer below using DropBox.
The three methods of transfer are described below:
Using Wi-Fi
Run GedFamilies Sync and select the “Sync device using Wi-Fi” tab. Select the Family Files View on your device, tap the menu button and select “Sync using Wi-Fi”:
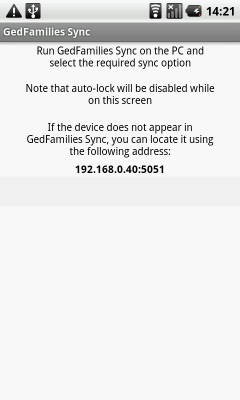
The device should appear in the list of devices in GedFamilies Sync if you have iTunes installed. If it fails to appear, tap the “Locate Device by Address” button and enter the address displayed on the device’s Sync screen.
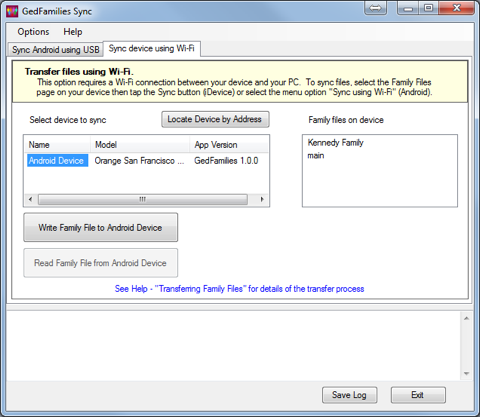
Tap the “Write Family File to …” button. A file selection dialog will be displayed, allowing selection of the GEDCOM family file to be transferred. This file will have the extension “.ged”.

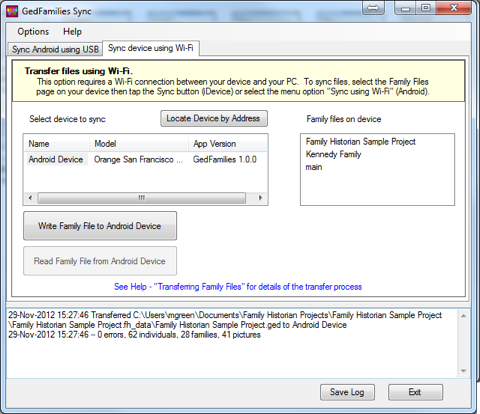
Click Open. The file will be converted to SQLite format, with any errors being displayed in the lower panel. It will then be transferred to the device and when complete, a summary message will be displayed:
Using USB
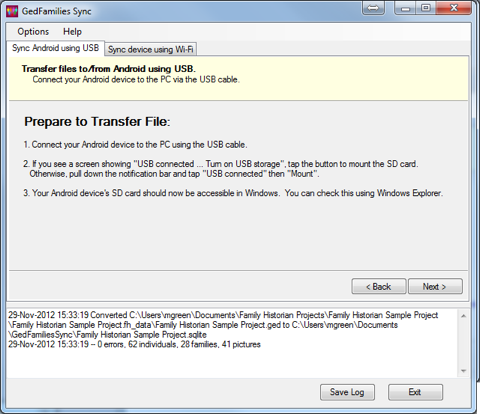
Run GedFamilies Sync and select the “Sync Android using USB” tab. Click “Write Family File to Device”.
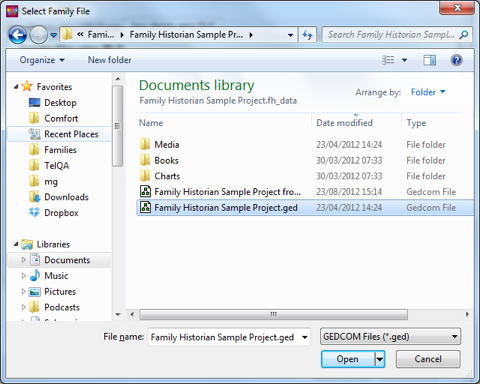
Click Next. A file selection dialog will be displayed, allowing selection of the GEDCOM family file to be transferred. This file will have the extension “.ged”.

Click Open. The file will be converted to SQLite format, with any errors being displayed in the lower panel:
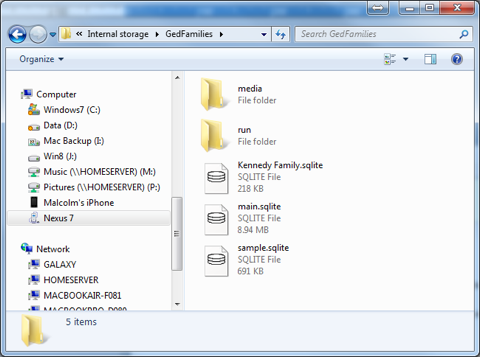
Connect your Android device to the PC using the USB cable. You now need to ensure that your device’s SD card is accessible in Windows. This varies according to device and version of Android. On some devices, simply plugging in the USB connection is sufficient to mount the SD card in Windows. With others you may see a dialog displayed when you plug in the USB cable to confirm whether you want to mount the SD card. If in doubt you should follow the instructions which came with your device (or are available via an online link) for mounting the SD card in Windows.
You can run Windows Explorer to check that the SD card is mounted in Windows. It will be shown as either as Removable Disk or a Portable Device.
In GedFamilies Sync, click Next. GedFamilies Sync will attempt to locate the GedFamilies folder on the device’s SD card and copy the SQLite file to it:
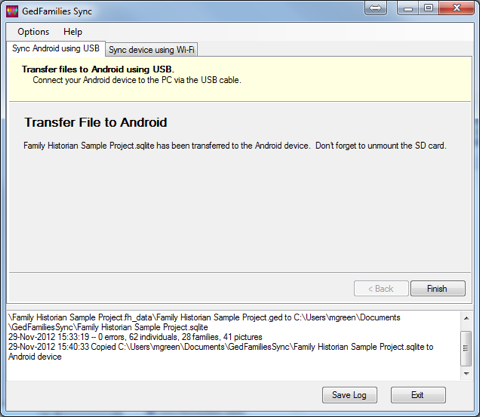
Click Finish and disconnect the USB cable to ensure that the SD card is no longer mounted in Windows.
Using DropBox
Run GedFamilies Sync and select the Options>Settings menu item. Set the value of the setting Default Path for SQLite files Transferred Independently to a subfolder called GedFamilies within your DropBox folder (create the folder if it doesn’t already exist).
Select the “Convert Family File” tab and click “Convert to SQLite file”. A file selection dialog will be displayed, allowing selection of the GEDCOM file to be converted.
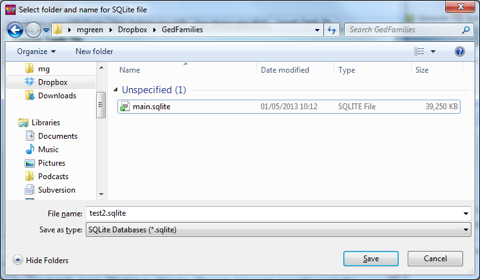
Click Open. Another file selection dialog will be displayed, allowing selection of the location to which the SQLite file is to be written. This will default to the name of the GEDCOM file with the .sqlite extension and the DropBox folder which you specified in Options>Settings above:
Click Save and the file will be converted to SQLite format, with any errors being displayed in the lower panel. If your PC has internet access and DropBox syncing is enabled, the SQLite file should now be automatically uploaded to DropBox. Note that this may take some time if it’s a large file - you can check on progress by hovering over the DropBox icon in the task bar.
Now run the DropBox app on your Android device, navigate to the GedFamilies subfolder and tap the name of the SQLite file just uploaded (if it’s not shown, the upload may not have completed yet). The file will be downloaded to your device; on completion a list of apps in which the file can be opened will be shown. Tap “GedFamilies” and the file will be transferred to GedFamilies; if there is already a file of that name you will be asked to confirm that you want to overwrite it. The Family Files View will then be displayed, showing the file just transferred.
The above instructions apply to DropBox, but the process is similar for other cloud services.